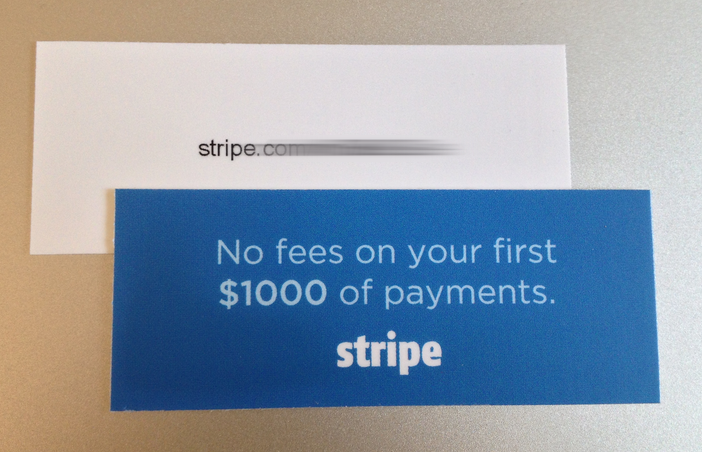
Discount Code Cards
I love career fairs. In college, I loved going to career fairs to get swag—EECS majors are definitely ridiculously spoiled when it comes to getting free things like shirts and food (I even got a poker set once!).
Anyway, while planning our trip to the UC Berkeley Startup Fair this year, I wanted Stripe to stand out so I thought pretty hard about what my favorite types of things to get were.
Number one was shirts, probably. We already had that covered. But I also remembered happily going to the Dropbox booth every semester to get those nifty free space cards: discount codes that you can apply to your account to get 5-10gbs of space at a time.
What if we made free Stripe processing cards? Since we'd be going to a career fair where all of the students were software engineers, and more specifically, very hacker/startup-minded, it made even more sense as a marketing effort.

Implementation
Most of the discount code implementation was already in place from our invite system, so all I really needed to do was generate an extra couple of hundred codes for use at the career fair. The hard part, however, was trying to figure out how to print them.
Traditional business card printing services won't let you print out cards with unique codes on them unless you go through some kind of custom order. I didn't have too much time to spare, so John told me about this nifty hack he used with Moo.com (I later found the same solution on Quora).
Moo lets you do this cool thing where you can print a variable number of designs per order—for example, if you want to have a different photograph on the back of each business card. We found that if you upload 100 different "designs" for 100 different cards, each card would be unique.
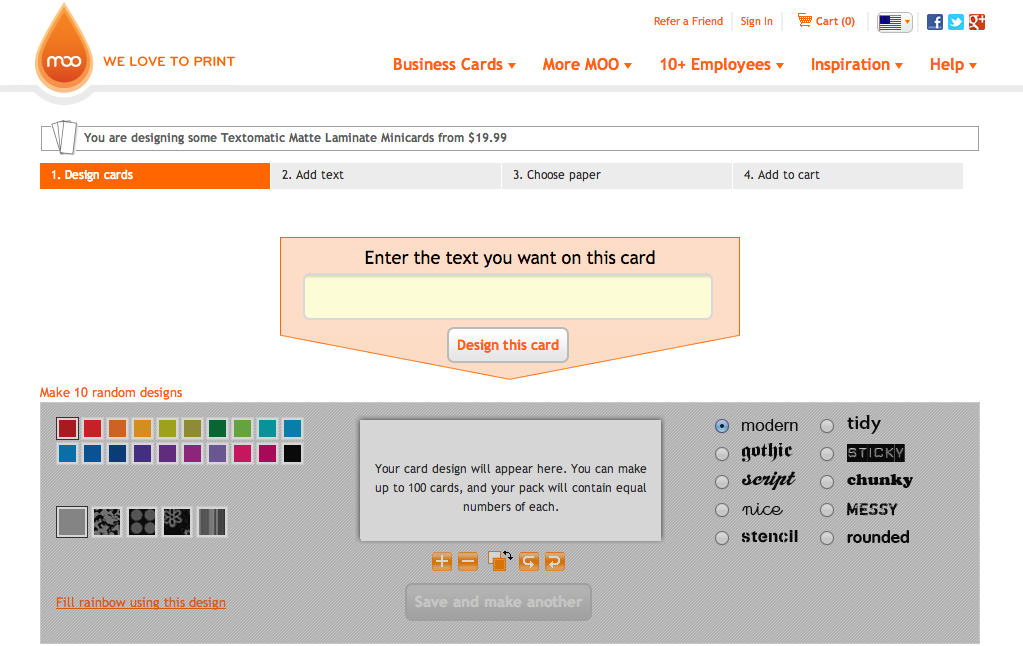
Their Text-o-matic tool lets you create up to 100 "designs" that are text only:

I took one look at the page and realized I could easily use a script to automatically generate all of the cards (sigh of relief when I discovered the page was not written in Flash):
// Create an array of the discount codes you want to use here
var texts = ['CODE1', 'CODE2', 'CODE3'];

// Click buttons on the page for each code to create the design
texts.each(function(text) {
  jQuery('#txtFrontText').val(text);
  jQuery('div#divMakeCard input').click();

  // Set color/size
  jQuery('#a_000000').click();
  jQuery('#aReverseColours').click();
  jQuery('#aZoomOut').click();
  jQuery('#aZoomOut').click();

  jQuery('#btnSaveCard').click();
});
Really, really simple but pretty hacky (just run this in the developer console on the web page). After this, you'll just go into their general template wizard and upload the design for the other side of the card to finish them up.
Improvements
Of course, there are several drawbacks to this approach:
- You can't really design the "variable" side of the card. You either need to upload the images yourself, or use Text-o-matic, which has a super limited set of options (you can't even add a new line or style separate parts of the text).
- You can only print 100 cards per order. Since the max number of designs you can upload is 100, if you try to double the card count to 200, you'll end up with every unique card twice.
So what can you do?
Probably the only legitimate way to do this is to generate the to-print PDF yourself, either using some kind of software (like InDesign) or hacking something in PostScript. I'll be sure to write a follow up post if I end up doing either!